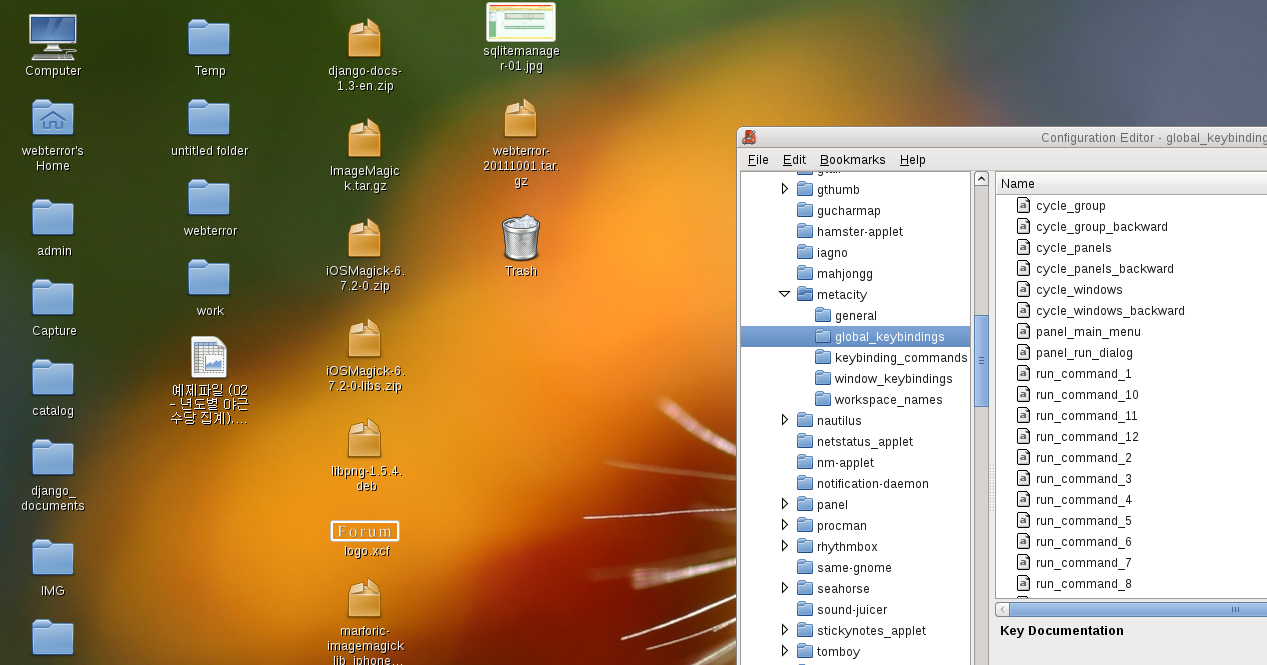
웹테러는 Gnome을 사용하면서 가장 답답했던것중 하나가 스크린 영역 캡쳐하기가 어렵다는 것이였다. 블로깅 하면서 어짜피 캡쳐를 많이 사용하게 될것 같아 설정하는 방법을 혼자서 알아보게 되었다.
의외로 그다지 어렵지 않았다. 먼저 스크린 캡쳐가 어떻게 이루어지는지 살펴보자
webterror@webterror ~ $ gnome-screenshot -h
Usage:
  gnome-screenshot [OPTION...] Take a picture of the screen

Help Options:
  -h, --help                     Show help options
  --help-all                     Show all help options
  --help-gtk                     Show GTK+ Options

Application Options:
  -w, --window                   Grab a window instead of the entire screen
  -a, --area                     Grab an area of the screen instead of the entire screen
  -b, --include-border           Include the window border with the screenshot
  -B, --remove-border            Remove the window border from the screenshot
  -d, --delay=seconds            Take screenshot after specified delay [in seconds]
  -e, --border-effect=effect     Effect to add to the border (shadow, border or none)
  -i, --interactive              Interactively set options
  --display=DISPLAY              X display to use
위의 내용을 보면 알겠지만 본래 gnome-screenshot 프로그램에는 –area라는 설정이 가능하고, border-effect 처럼 그림자효과도 넣을수 있게 되어있다. 그런데 Gnome에서 기본 단축키로는 설정이 안되어있을뿐인 것이다.
이제 설정을 해보자. gconf-editor를 키고 해당하는 값들을 바꾸는 방법을 알아보자.
$ gconf-editor
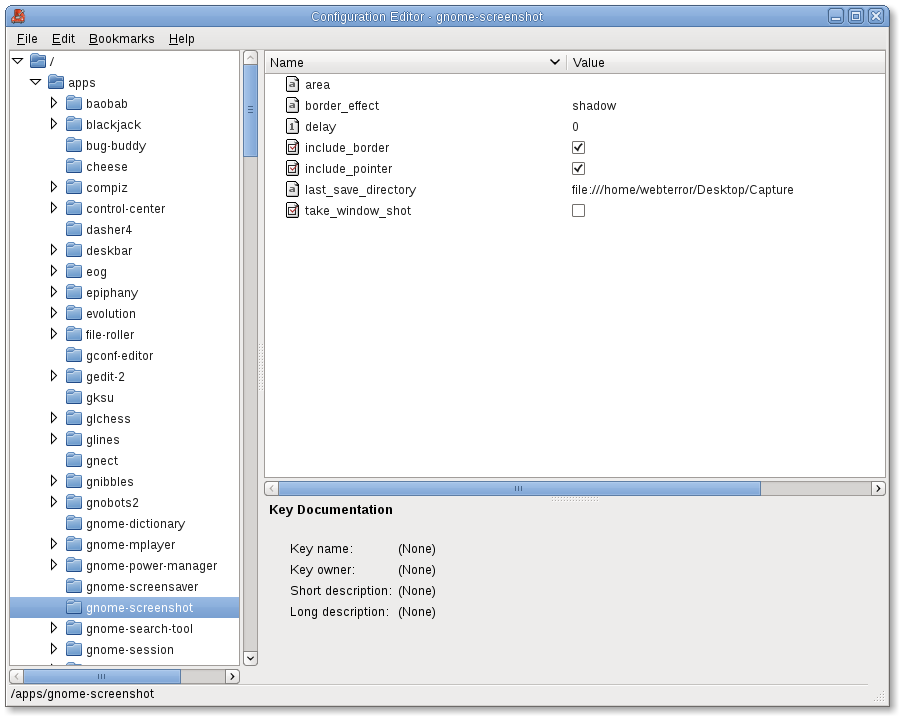
1) 먼저 border-effect 값을 설정하자.
/ – apps/ – gnome-screenshot/ – include-border 에 체크를 한다.
/ – apps/ – gnome-screenshot/ – border_effect 는 shadow로 바꾸어 준다.
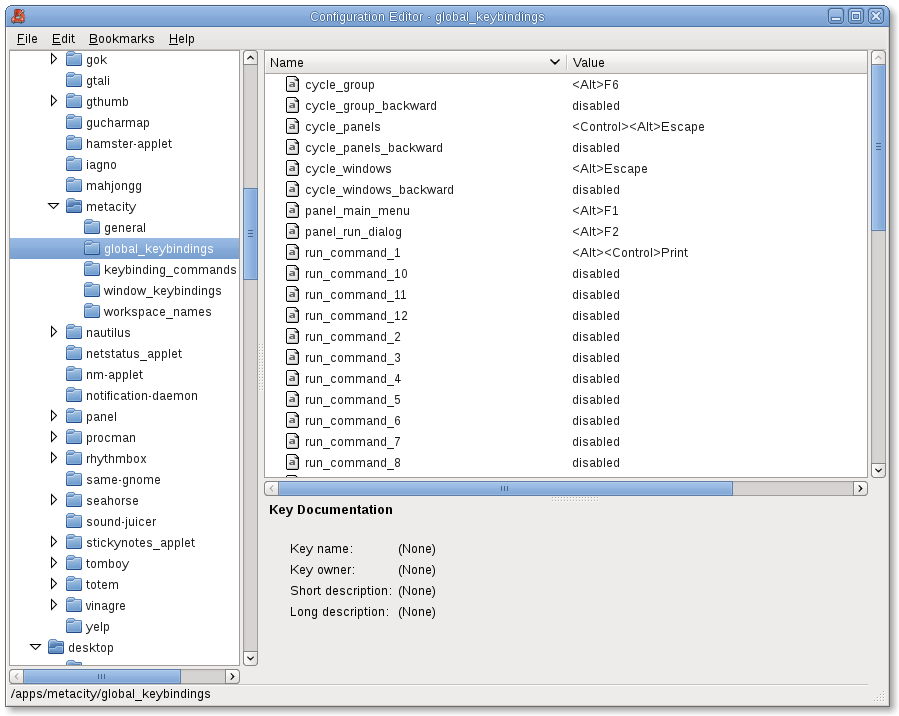
2) 이후 단축키를 설정하자.
/ – apps/ – metacity/ – global_keybindings – run_command_1 –
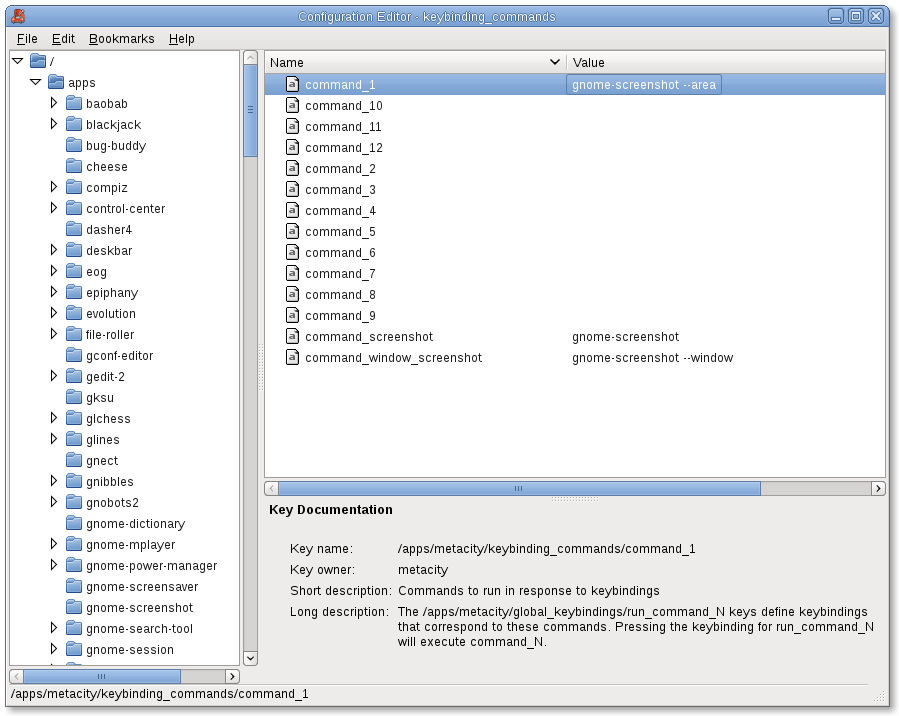
/ – apps/ – metacity/ – keybinding_commands – command_1 – gnome-screenshot –area
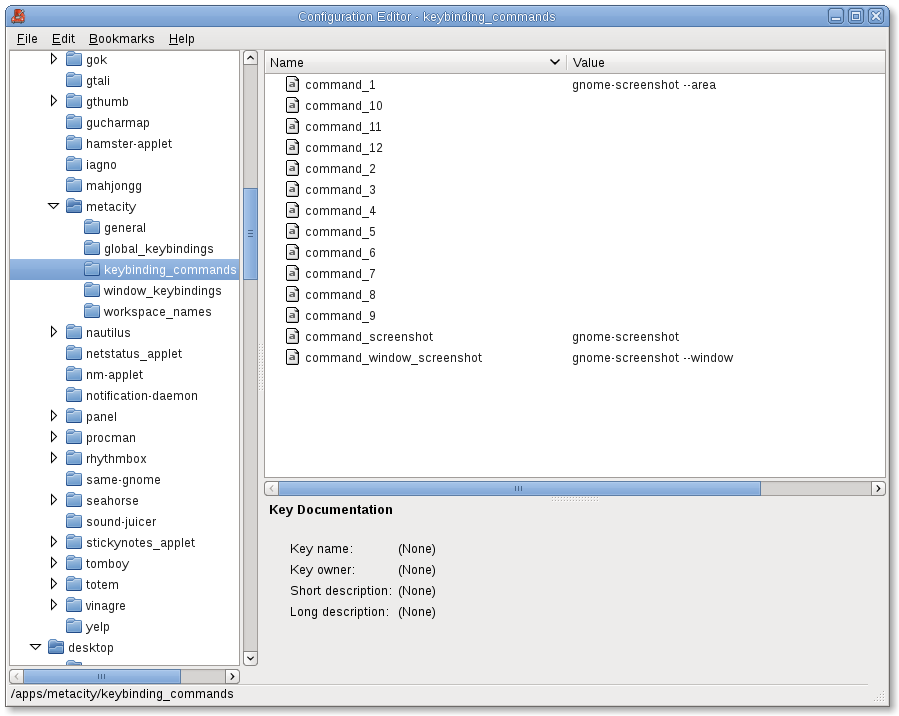
위와 같이 설정을 해주면 Alt키와 Control키 그리고 프린트스크린키를 동시에 누르면 영역을 지정하는 + 마우스 포인터가 나온다. 이후 캡쳐하면 될것이다. ^^
아래는 캡쳐후 저장한 사진!!
